
Shopify Tutorial
Shopify Liquid Blocks: A Beginner's Guide
Open a JSON template in a Shopify theme and try to tell what the page looks like.
You can't, at least not from that file. You open the section files, then settings_data.json, then the theme editor, and piece the page together in your head.
Shopify Liquid blocks change that. The new {% block %} tag lets you render theme blocks directly on any template, so the whole page composition sits in one file you can read top to bottom. So can your AI coding agent.
It's still in developer preview, so its inner workings can change before it ships to everyone. But it's the right time to learn it.
In this post, we'll go over how to set up a store to try it, what the block tag does, the four things you can pass to a block (and which of them snippets can't take), what's actually new here, and the limitations as of writing.
If theme blocks are new to you, read our Shopify Theme Blocks guide first. This post builds on it.
Let's go!
What Are Shopify Liquid Blocks?
{% block %} is a new Liquid tag that renders a theme block directly on the page.
{% block 'container' %}{% endblock %}That line renders blocks/container.liquid.
If you've used snippets before, you already know how this works. {% render 'product-card' %} renders snippets/product-card.liquid. {% block %} does the same thing, it just looks in the blocks/ folder.
The difference is what a block can take. On top of everything a snippet accepts, a block can receive body content, schema setting values, and literal arrays. We'll cover each one below and compare it to its snippet equivalent, so you can see exactly where the two tags differ.
How to Set Up a Store for the Liquid Developer Preview
The block tag only works on a dev store that has the preview turned on. You pick it when you create the store, in the Dev Dashboard:
- Log in to the Dev Dashboard and select Stores
- Select Create store, then Dev as the store type
- Name the store and pick a plan
- Select Test a feature preview, then Liquid July '26 changes
- Select Create store
Next, you need a theme. Shopify recommends starting from the Skeleton theme release candidate, which already uses the new tags throughout:
git clone -b rc-v2.0.0 https://github.com/Shopify/skeleton-theme.git
cd skeleton-theme
shopify theme dev --store your-dev-store
You can also add the tags to an existing theme. Your sections, theme settings and JSON templates keep working, per the developer preview overview. Just make sure that you are still under the dev store with the developer preview enabled.
Rendering Your First Liquid Block
Create two files with the same markup. One snippet, one block:
{% # snippets/first-block.liquid %}
<div class="highlight">
  <h3>Rendered from snippets/first-block.liquid</h3>
  <p>This card came from the snippets folder, called with the render tag.</p>
</div>
{% # blocks/first-block.liquid %}
<div class="highlight" {{ block.shopify_attributes }}>
<h3>Rendered from blocks/first-block.liquid</h3>
<p>This card came from the blocks folder, called with the block tag.</p>
</div>
{% schema %}
{
"name": "First block",
"settings": []
}
{% endschema %}Then render both inside an empty templates/index.liquid to quickly see the results:
{% # templates/index.liquid %}

{% render 'first-block' %}

{% block 'first-block' %}{% endblock %}
You get two identical cards on the page.
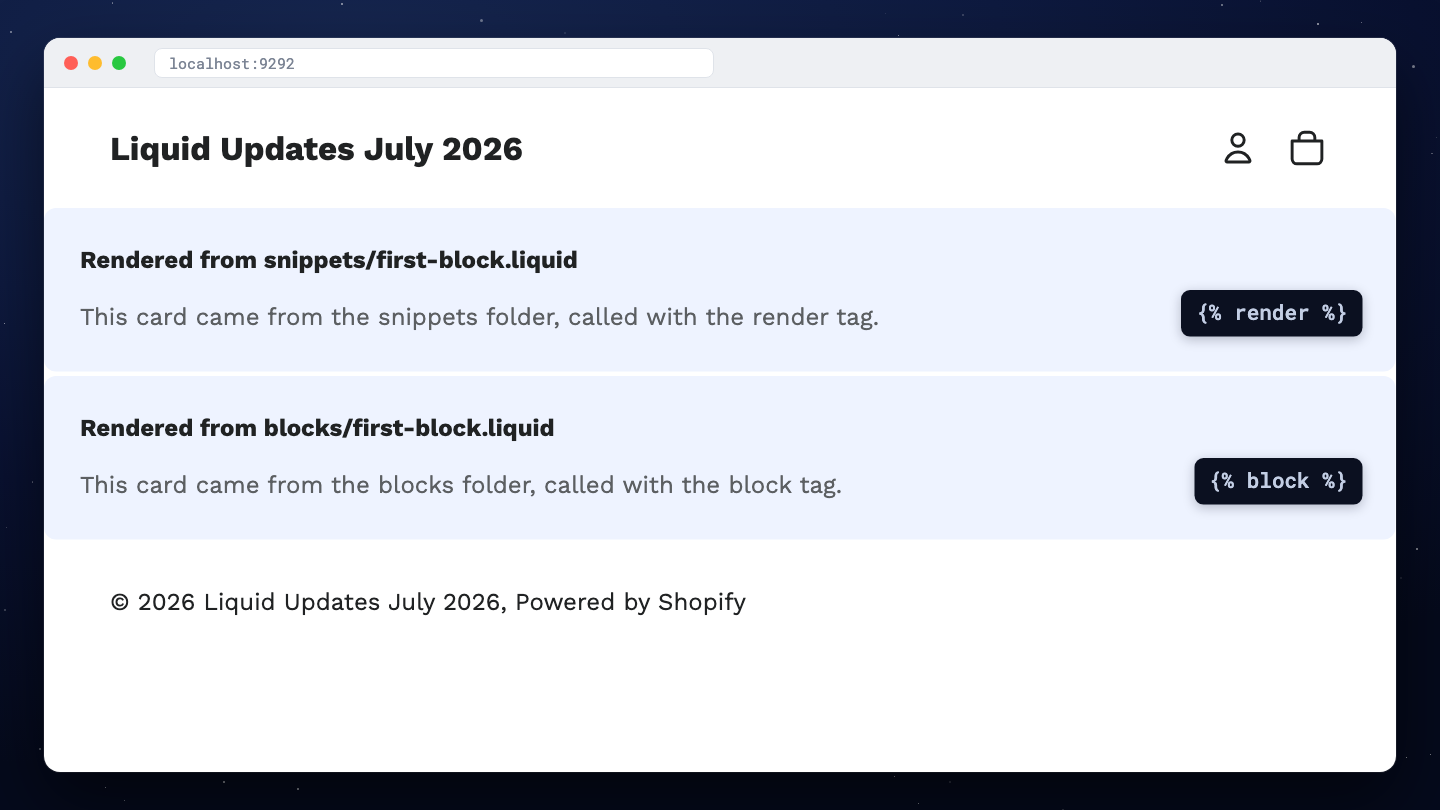
However, the two files differ in exactly two places:
- A block needs a
{% schema %}, even an empty one. A snippet has none. - A block should keep
{{ block.shopify_attributes }}on its root element, so the theme editor can identify it.
Notice the {% endblock %} too. It's required on every block tag, even when there's nothing between the two tags. It looks odd for now, and the block.content section below explains why the tag has a body.
Passing Values to a Liquid Block
Passing values works exactly like it does with snippets. Name the value after the block name:
{% render 'pass-values', tag: 'section', message: 'Passed from the template' %}

{% block 'pass-values', tag: 'section', message: 'Passed from the template' %}
{% endblock %}
Inside the file, the value arrives as a plain Liquid variable. The receiving code is identical in the snippet and the block:
{% # blocks/pass-values.liquid and snippets/pass-values.liquid %}

{%- assign tag = tag | default: 'div' -%}

<{{ tag }} class="highlight" {{ block.shopify_attributes }}>
  <p>message = {{ message }}</p>
</{{ tag }}>
Both cards render inside a real <section> element, and | default: still falls back when you leave the value out.
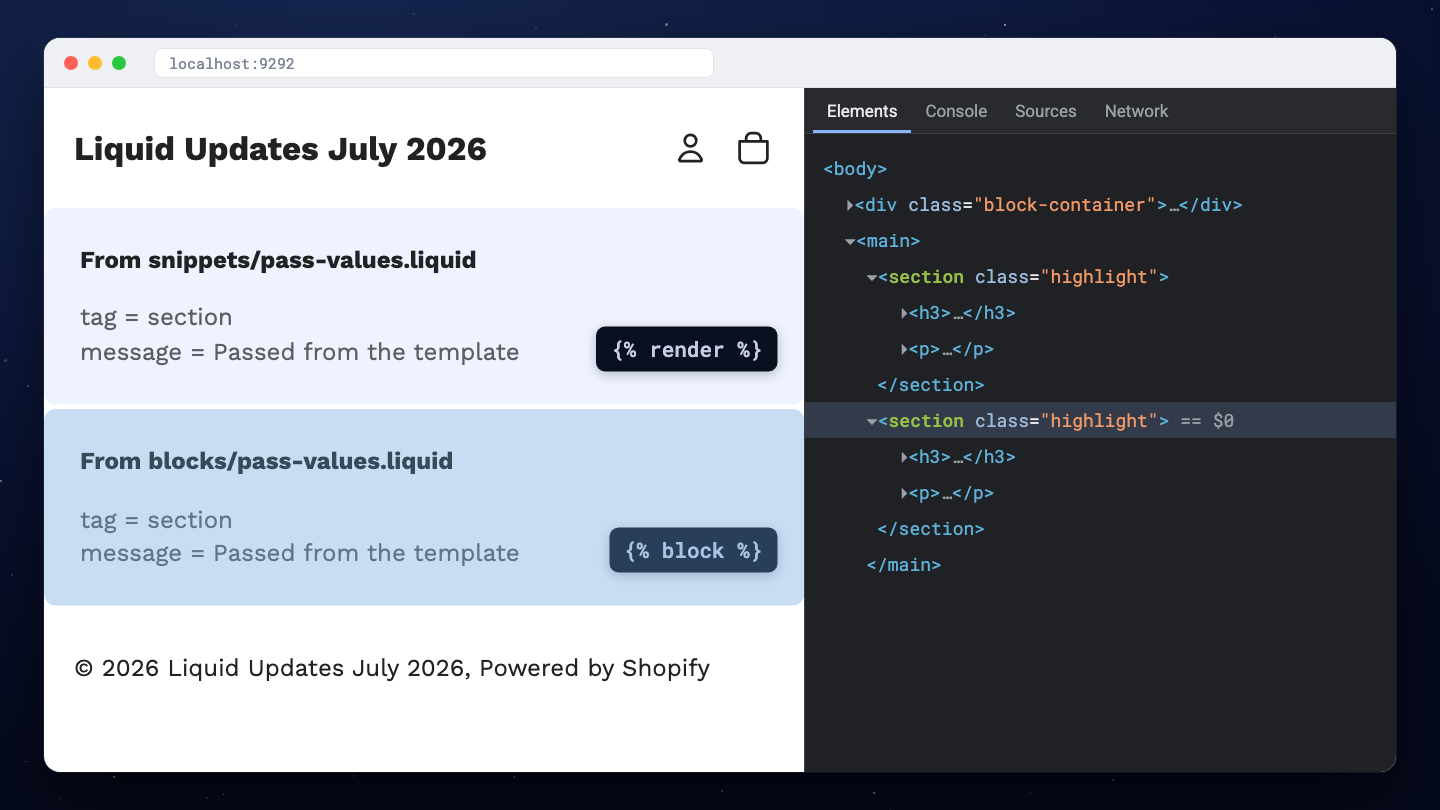
So there is nothing new to learn here when you move from render to block. Parameters are the part the two tags share. The next three sections are the parts they don't.
Passing Content with block.content
Anything you write between {% block %} and {% endblock %} is passed to the block as {{ block.content }}. The block decides where to print it.
Here's a block that owns a heading and a frame, and prints whatever the caller passes in:
{% # blocks/pass-content.liquid %}
<div class="highlight" {{ block.shopify_attributes }}>
  <h3>From blocks/pass-content.liquid</h3>
  <p>Everything below came from the start and end block:</p>

  {{ block.content }}
</div>
Now call it twice with different content:
{% block 'pass-content' %}
  <p>Hello from the template.</p>
{% endblock %}

{% block 'pass-content' %}
  <p>A different message, same block file.</p>
  <p>Body content can be any markup you want.</p>
{% endblock %}
One block file, two calls, two different cards. The top half of each card comes from the block file and is identical. The bottom half comes from the passed content and is different every time.
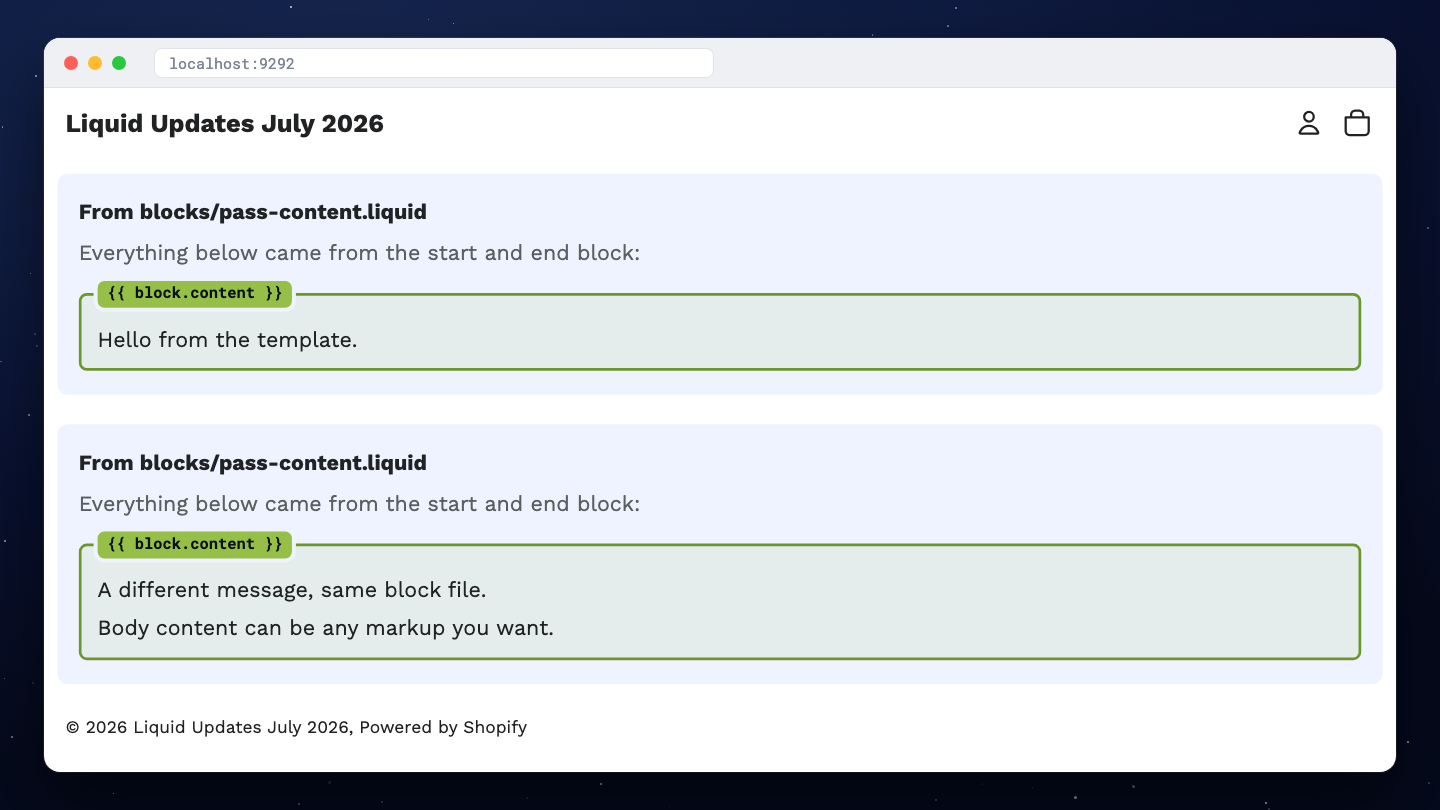
Snippets can't do this. A snippet only ever receives parameters, never a body or content.
The content that block receives can be plain markup, Liquid, snippets, or other block tags. That last one is what makes a block useful as a wrapper. The Skeleton theme's layout/theme.liquid wraps its header in a container block this way:
{% block 'container', tag: 'div' %}
  {% block 'header' %}{% endblock %}
{% endblock %}
A tip from the docs: when a block only needs to display text or markup, pass it as body content instead of adding a title or heading parameter. Add a parameter only when the block has to do something with the value.
Setting Liquid Block Settings from the Template
If a block has a setting in its schema, you can set that setting's value right in the tag. Use the full path, block.settings.<id>, as the parameter name:
{% block 'pass-settings', block.settings.alignment: 'left' %}{% endblock %}

{% block 'pass-settings', block.settings.alignment: 'right' %}{% endblock %}
The block then reads it normally:
{% # blocks/pass-settings.liquid %}
<div class="highlight" style="text-align: {{ block.settings.alignment }};"
  {{ block.shopify_attributes }}>
  <p>alignment = {{ block.settings.alignment }}</p>
</div>

{% schema %}
{
  "name": "Pass settings",
  "settings": [
    {
      "type": "select",
      "id": "alignment",
      "label": "Alignment",
      "options": [
        { "value": "left", "label": "Left" },
        { "value": "center", "label": "Center" },
        { "value": "right", "label": "Right" }
      ],
      "default": "left"
    }
  ]
}
{% endschema %}
Same block file, two cards, one aligned left and one aligned right. Nothing in the block file changes between them. The only difference lives in the template.
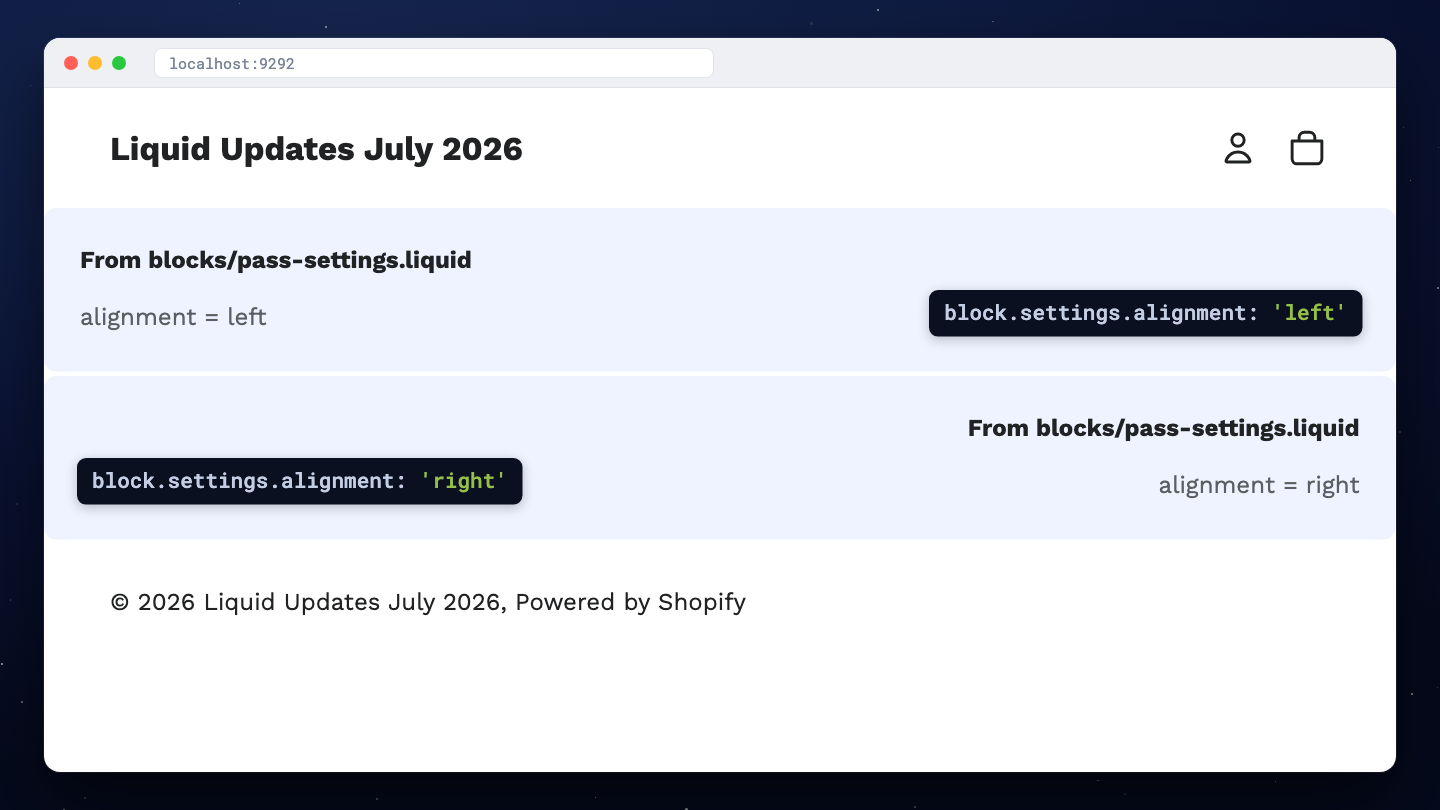
The value you pass has to be one of the options the setting allows. For a select setting like this one, that's left, center or right.
This is the second thing snippets can't do, because a snippet has no schema. It helps to keep the two inputs apart:
| Input | Normally set by | Where |
|---|---|---|
Parameters (tag:, message:) |
The developer | The template |
block.settings.* |
The merchant | The theme editor |
Setting a block.settings value from the template is for when you place a block in code rather than a merchant dropping it in through the editor. The Skeleton theme's layout/password.liquid page centres its content this way:
{% block 'container', block.settings.alignment: 'center' %}
  <h1>{{ 'password.title' | t }}</h1>
  ...
{% endblock %}
Passing Literal Arrays to a Liquid Block
You can write an array directly in the block tag:
{% block 'badge-list', badges: ['New arrival', 'Low stock', 'Online only'] %}
{% endblock %}
And loop over it inside the block like any other array:
{% if badges == blank %}
  <p>badges = nothing received</p>
{% else %}
  <ul>
    {% for badge in badges %}
      <li>{{ badge }}</li>
    {% endfor %}
  </ul>
{% endif %}
This is the third thing only a block can do. The docs are explicit: {% render %} does not accept an array written directly in the tag.
However, be aware that the snippet version fails silently. Passing the same array to a snippet with the same loop does not get an error. The array just never arrives, so the snippet renders badges = nothing received and the rest of the page loads as normal. Theme Check doesn't flag it either, so you'll only catch it by looking at the page. This might change in the future, however.
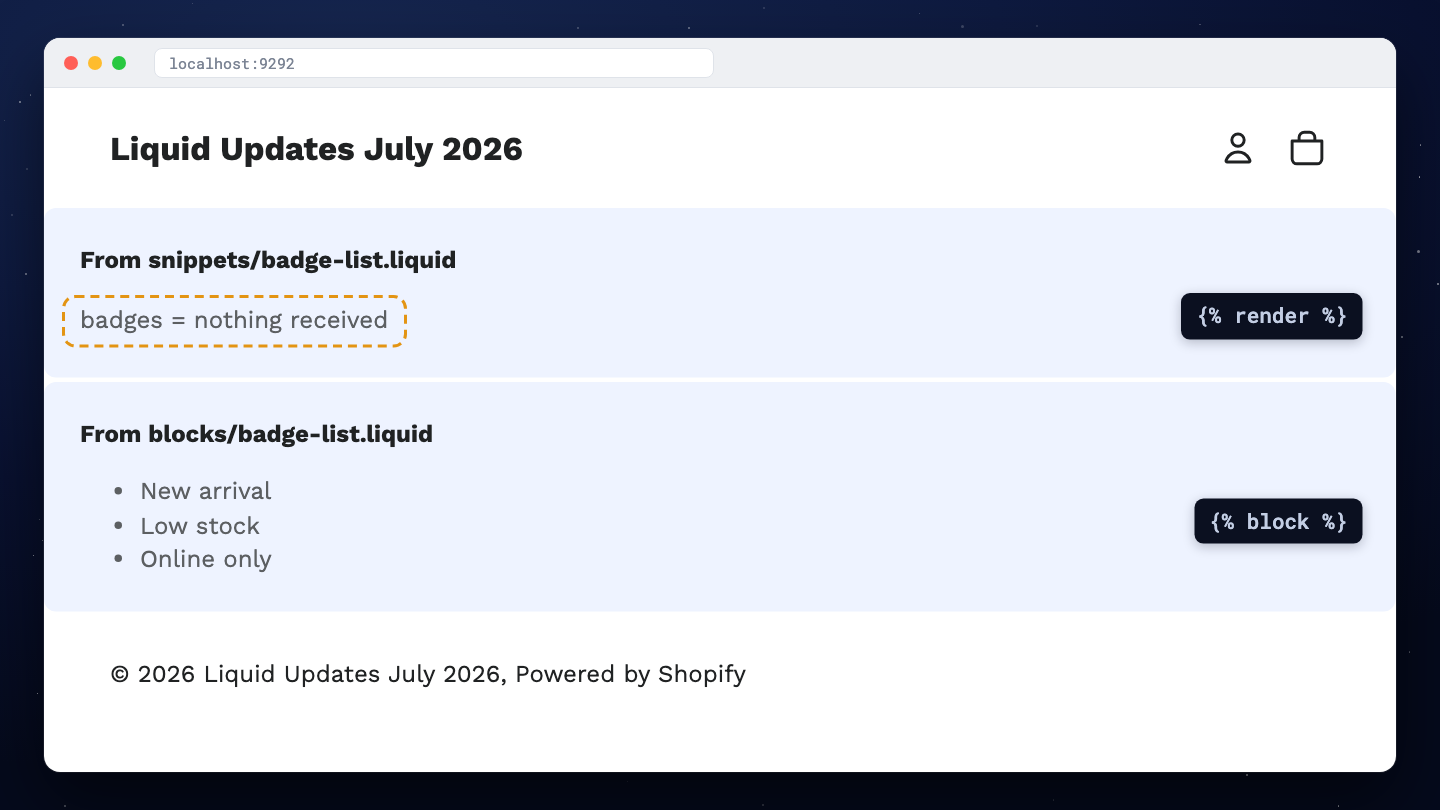
Snippets can still take arrays. They just can't take one written inline, so build it first and pass the variable:
{% assign badges = 'New arrival,Low stock' | split: ',' %}
{% render 'badge-list', badges: badges %}
Literal arrays work for block.settings too, including objects like collections:
{% block 'collection-list',
  block.settings.collections: [collections['summer'], collections['sale']] %}
{% endblock %}
Building a Page with Shopify Liquid Blocks
Put those features together and you can compose a whole page in a Liquid template. Here's the Skeleton theme's templates/product.liquid, shortened:
{% # templates/product.liquid %}
{% block 'container' %}
  <div class="product-layout">
    <div class="product-images">
      {% render 'image', class: 'product-image', image: product.featured_image %}
    </div>

    <div class="product-info">
      <h1>{{ product.title }}</h1>
      <p>{{ product.price | money }}</p>
      <p>{{ product.description }}</p>
    </div>

    <div class="product-form">
      {% form 'product', product %}
        ...
      {% endform %}
    </div>
  </div>
{% endblock %}
Read it top to bottom and you know what the page is: a container, an image, the title, price and description, and a product form. You didn't open another file to find out.
Compare that with a JSON template, which only lists section IDs and their settings. To know what renders, you open each section file, check which blocks it allows, then read the saved values in the JSON or open the theme editor.
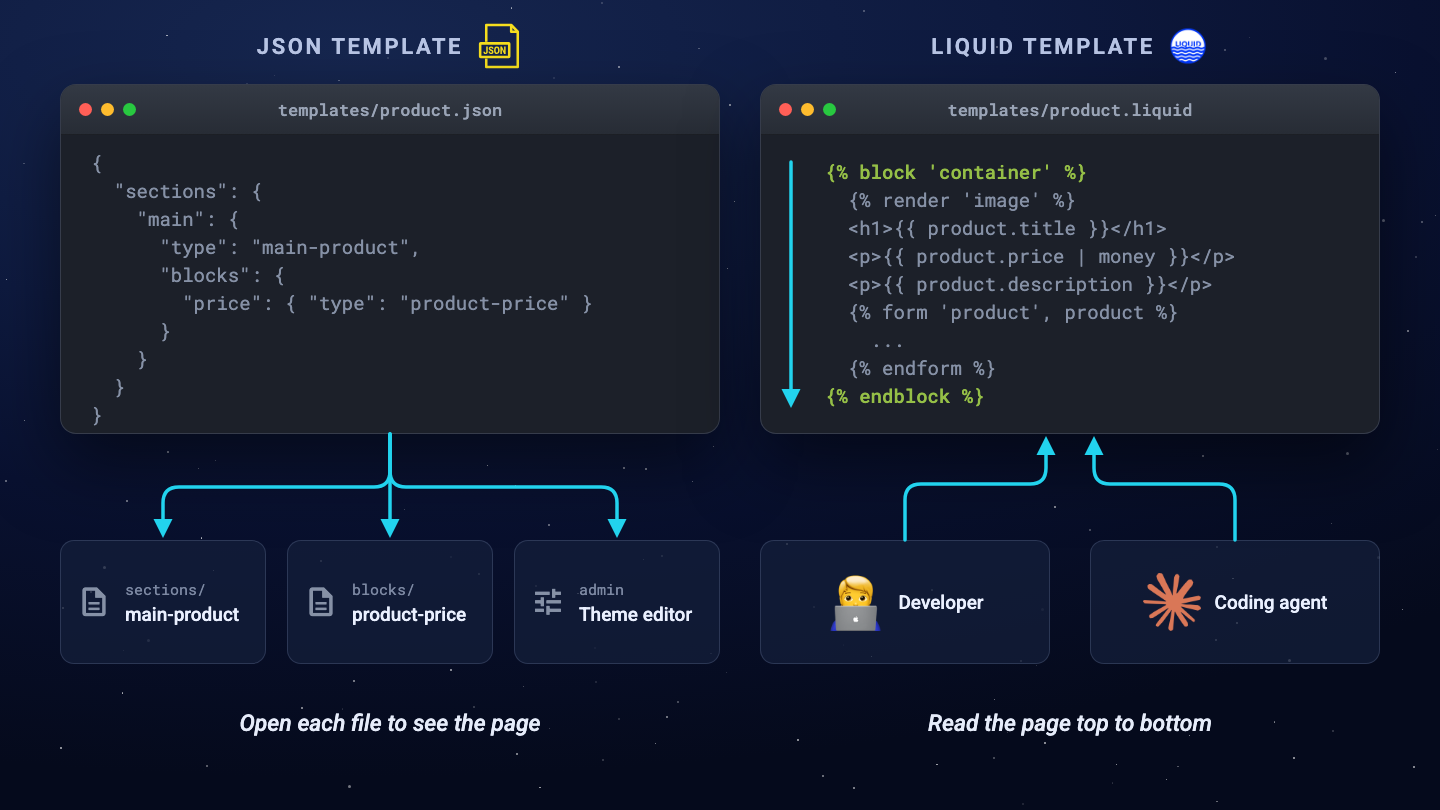
That's the real benefit. A developer opening the template understands the page straight away, and so does an AI coding agent working on the theme, without reading a chain of nested files first.
What's Actually New with Liquid Blocks
It's easy to read the block tag as a new kind of theme block. It's really not.
What didn't change:
- Theme blocks work the same way they did before
- Sections can still be built out of theme blocks and nested blocks
- Blocks can already wrap other blocks, by nesting them
What's new:
- A tag that renders a theme block by name, straight from Liquid
- Body content, schema setting values and literal arrays passed in that tag
- As a result, a Liquid-first way to build a page: Liquid templates plus theme blocks plus snippets
It also doesn't replace anything. JSON templates, sections and the theme editor all still work, so the block tag is a second way to build pages, not a migration you have to plan.
You might ask whether Liquid templates with {% section %} tags were already Liquid-first. Partly, but a section tag hides most of the page. You can't see the section's settings or which blocks it renders without opening the section file and the saved data, and you can't pass it body content or parameters the way you can with a block. Likewise, it is similar for static blocks.
{% block %} vs {% render %} vs {% content_for 'block' %}
Three tags can now put a reusable piece on the page. Here's how they compare, as of writing:
{% render %} |
{% content_for 'block' %} |
{% block %} |
|
|---|---|---|---|
| Renders from | snippets/ |
blocks/ |
blocks/ |
| Pass parameters | Yes | Yes | Yes |
Body content (block.content) |
No | No | Yes |
| Inline literal arrays | No | No | Yes |
| Who controls the page | The developer | The merchant, in the theme editor | The developer, in the template |
| Built for | Reusing markup | Themes built from blocks in the editor, like Horizon | Liquid-first pages you can read in the template |
A simple way to choose, following the docs' comparison:
- Use
renderfor internal markup that never needs editor settings - Use
content_forwhen the merchant should arrange the page in the theme editor - Use
blockwhen the template should own the page composition
Limitations of Shopify Liquid Blocks
As of writing, the theme editor doesn't support pages built this way. A merchant who opens a Liquid template built with block tags can't:
- Reorder the blocks
- Change the block settings
Instead, the editor shows an empty sidebar that says the page doesn't have any sections, while the preview renders the page as normal.
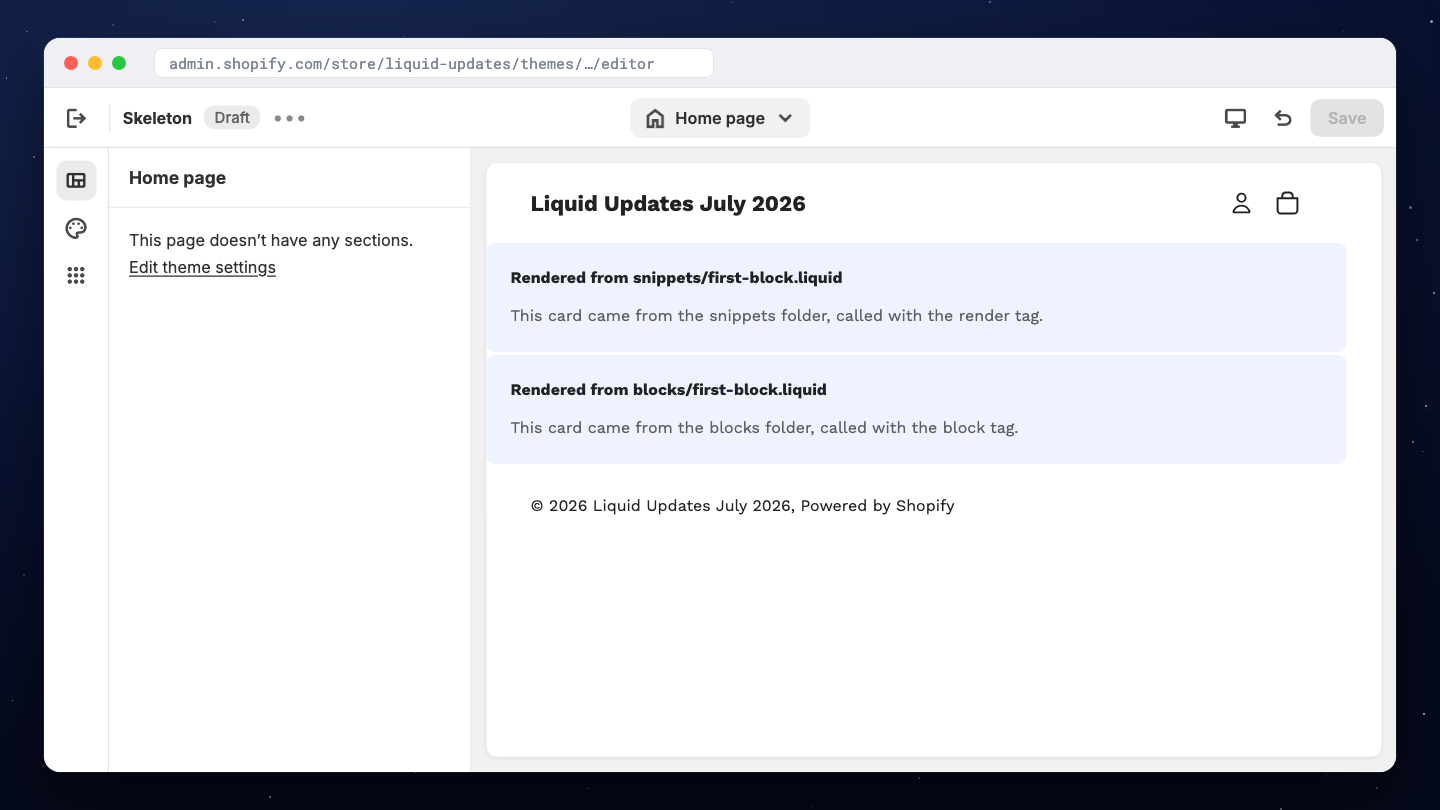
Shopify has said this is being worked on. Until then, the practical rule is to use block tags where the developer owns the layout, and keep JSON templates for pages the merchant needs to edit.
The other limitation is the preview itself. Tag behaviour can still change before general availability, so treat everything above as something to learn and test with, not something to ship on a client store yet.
Final Thoughts
The block tag works like render and then does three more things: it takes body content, it sets schema settings, and it accepts literal arrays.
Put together, those let you build a page whose structure you can read in one file. That matters for you, and it matters more every month for the AI agents working on your themes.
Set up a dev store with the Liquid July '26 changes preview, clone the Skeleton release candidate, and rebuild one page with block tags. It's the fastest way to see whether this fits how you build.
Cheers,
Jan
Shopify Liquid Blocks FAQ
What is the Liquid block tag in Shopify?
{% block %} is a Liquid tag that renders a theme block from the blocks/ folder directly on the page, the way {% render %} renders a snippet. It can also take body content, schema setting values and literal arrays, which snippets can't. It's part of the Liquid July '26 developer preview.
Why did Shopify add Liquid blocks?
To give themes a Liquid-first way to build pages, where the whole page composition lives in the template. With JSON templates, you have to open the section files, the saved settings and often the theme editor to know what a page looks like. With block tags, a developer (or an AI coding agent) opens one Liquid template and reads the page top to bottom. It adds a way to build pages rather than replacing the existing one.
How do I enable Liquid blocks on my Shopify store?
Create a new dev store in the Dev Dashboard and select Liquid July '26 changes under Test a feature preview. The tag only works on dev stores with that preview enabled, and Shopify recommends starting from the Skeleton theme release candidate.
What's the difference between a Liquid block and a snippet?
Both render a reusable file and both accept parameters. A block also accepts body content through {{ block.content }}, schema setting values through block.settings, and inline literal arrays. A block file needs a {% schema %}, and a snippet doesn't.
Can merchants edit Liquid blocks in the theme editor?
Not yet. As of writing, the theme editor can't reorder blocks or change block settings on a page built with block tags. It shows an empty sidebar instead, and Shopify has said this is being worked on.
Do Liquid blocks replace JSON templates and sections?
No. JSON templates, sections and the theme editor all keep working. The block tag adds a second, Liquid-first way to build a page, for when the developer should own the composition.